How To Recover Corrupted Files From Hard Drive?

If you are looking for ways to recover files from a corrupt hard drive, This article helps you to recover files from corrupt hard drive recovery is often complex and only professional hard drive recovery software can help you restore data from the corrupt hard drive. If you want to quickly get back files from your hard drive, use Hi5 Partition Recovery Tool by clicking on the download button below

Download NowDownload Now

A hard drive is the hardware component that stores all of your digital content. Your documents, pictures, music, videos, programs, application preferences, and operating systems represent digital content stored on a hard drive. Hard drives can be external or internal.

Internal hard disks reside in a drive bay, connected to the motherboard using an ATA, SCSI, or SATA cable. They are powered by a connection to the computer’s PSU (power supply unit). Examples of data stored on a computer’s hard drive include the operating system, installed software, and the user’s personal files.

They are called “hard drives” because the platters inside them are made of rigid (hard) plates of metal. They are “hard” disks. Compared to the “floppy drives” which had a flexible plastic disk inside them.

What Happens When Your Hard Drive Gets Damaged?

When a hard drive gets corrupted, it means that the data stored on the drive is no longer accessible or may be partially or completely lost. This can happen for various reasons, such as power surges, hardware failure, software bugs, virus attacks, or physical damage to the drive.

The specific symptoms and consequences of a corrupted hard drive can vary depending on the severity and type of corruption, but some common signs may include:

  • Inability to boot up the computer or access certain files or folders
  • Frequent system crashes or error messages
  • The slow performance or freezes when accessing files or running programs
  • Strange noises coming from the hard drive
  • Missing or corrupted files and data

Note: It is important to note that attempting to recover data from a corrupted hard drive can be a complex and risky process, and it is important to take proper precautions to avoid further damage or data loss. It is recommended to always keep a backup of important data to avoid the risks associated with hard drive corruption.

Reasons For the Corruption Of Hard Drive

There are several reasons that can lead to the corruption of a hard drive. Here are some of the most common reasons:

  • Physical damage: Physical damage to a hard drive can cause data corruption. This can happen due to factors such as impact or shock, overheating, or exposure to moisture or other environmental factors.
  • File system errors: File system errors can occur due to improper shutdown of the system, power outages, or software bugs. These errors can cause corruption of the file system, making the data on the drive inaccessible.
  • Virus and malware: Virus and malware infections can cause hard drive corruption by altering or deleting important system files and data.
  • Human error: Accidental deletion of files, formatting of the wrong drive, or improper handling of the hard drive can also cause data corruption.
  • Firmware corruption: Firmware is the software that controls the hard drive’s functions. Corruption of firmware can cause hard drive malfunction and data loss.
  • Bad sectors: Bad sectors are areas on the hard drive that cannot be read or written to. This can occur due to physical damage, wear, and tear, or other factors, and can cause data corruption and loss.

It is important to take proper care of your hard drive to avoid data loss due to corruption. This includes regular backups, proper handling and storage, and using reputable anti-virus software to protect against malware and virus infections.

How To Recover Files From Corrupt Hard Drive

Method 1: Restore Files From Corrupt Hard Drive By Running CHKDSK

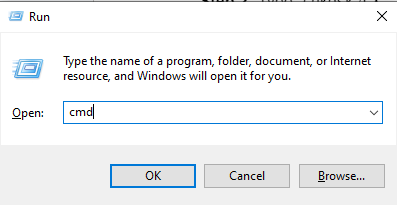
Running the chkdsk (check disk) command can sometimes help recover files from a corrupt hard drive. Here’s how to do it:

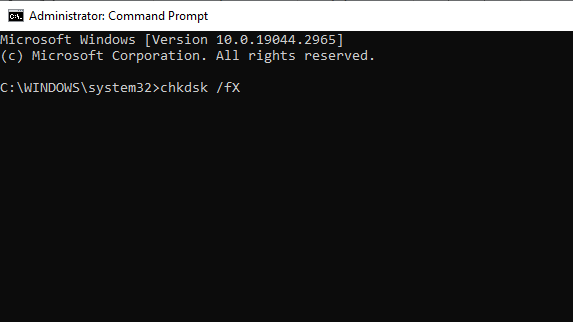
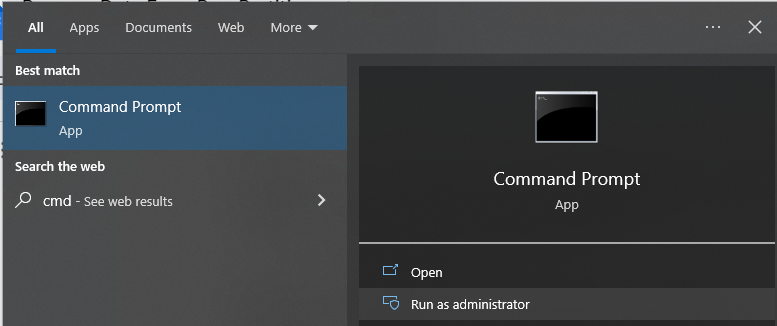
Step 1: Open the Command Prompt: Click on the Start menu and type “cmd” in the search bar. Right-click on Command Prompt and select “Run as administrator”.

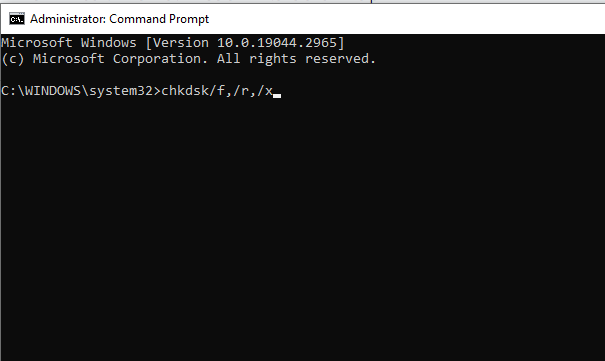
Step 2: Type the chkdsk command: In the Command Prompt window, type “chkdsk [drive letter]: /f /r /x”, where [drive letter] is the letter of the corrupted hard drive. The /f, /r, and /x options tell chkdsk to fix errors, locate bad sectors, and force a dismount of the drive if necessary.

Step 3: Wait for chkdsk to finish: The chkdsk process can take some time, depending on the size and extent of the corruption. Once it’s finished, check if the corrupted files have been recovered.

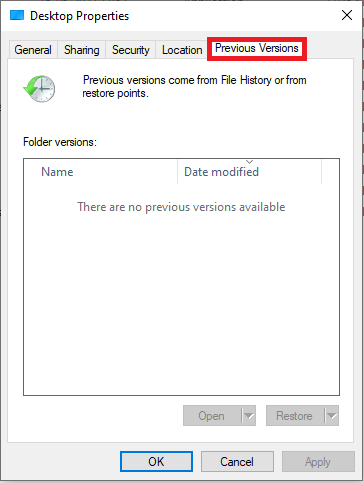
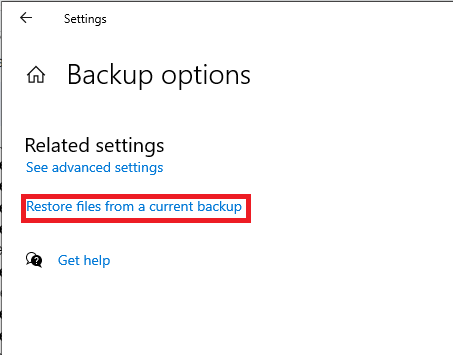
Method 2: Restore Data From the Damaged Hard Drive By Using Backup

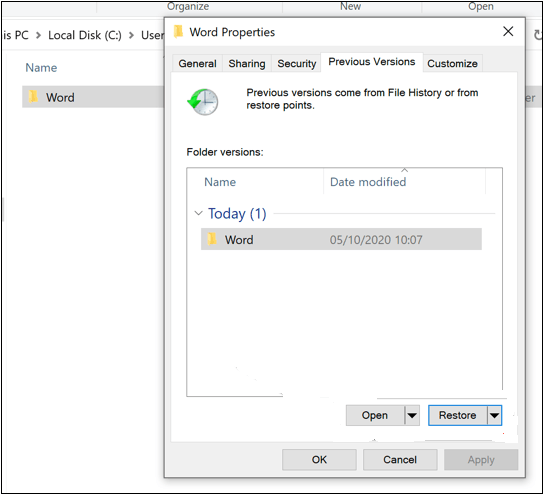
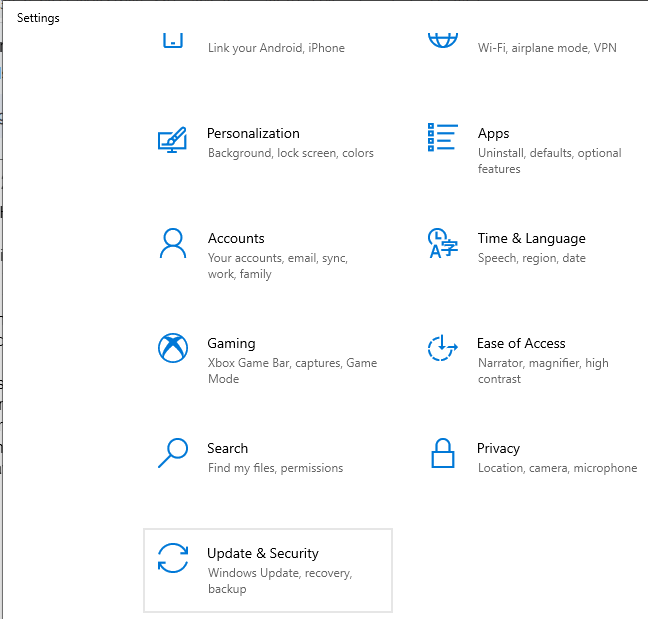
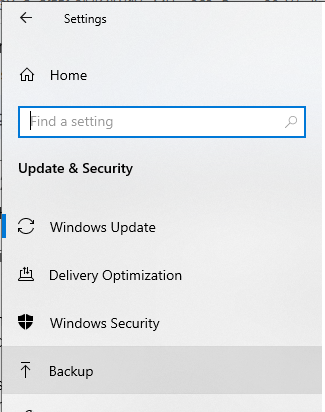
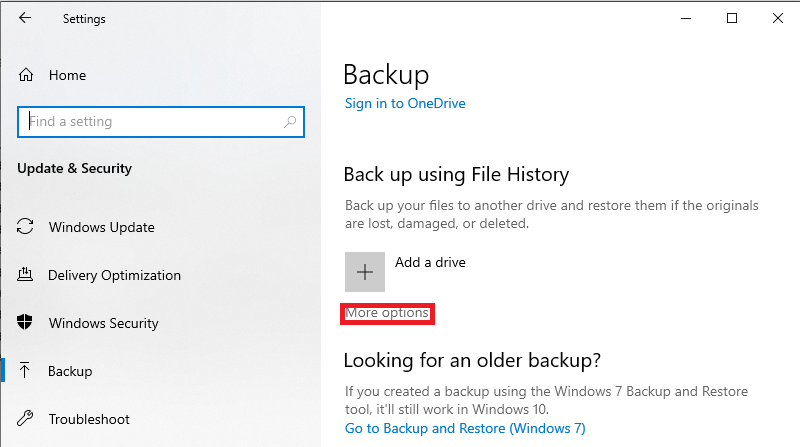
If you have backed up your data on an external hard drive, cloud storage, or any other storage device, you can restore the data from the backup to recover the lost or damaged data from the hard drive. Here are the steps to restore data from a backup:

Step 1: Connect the backup storage device to your computer.

Step 2: Open the backup software and locate the backup file containing the lost or damaged data.

Step 3: Select the files or folders that you want to restore from the backup.

Step 4: Choose the location where you want to restore the files to. Make sure you restore the files to a different hard drive or location than the one where the original files were stored to avoid overwriting any existing data.

Step 5: Start the restore process and wait for it to complete.

Step 6: Once the restoration process is complete, check the restored files to ensure they are complete and intact.

Method 3: Retrieve Files From Corrupt Hard Drive By Hi5 Partition Recovery Tool

Hi5 Partition Recovery is an award-winning tool loved by millions of users across the globe, the tool is user-friendly to make recovering files from corrupt hard drives extremely easy. You can easily restore your files without any modification. The tool is built with powerful algorithms that dive deeper into the petition to recover more than 500 types of files lost due to any reason. It supports all kinds of brands of external hard drives like Samsung, SanDisk, Toshiba, and Seagate portable drives, etc The tool is compatible with all versions of Windows and Mac. 

Download NowDownload Now

Steps To Recover Data From a Damaged Hard Drive

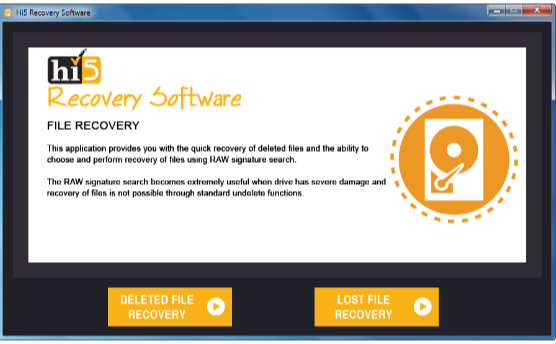
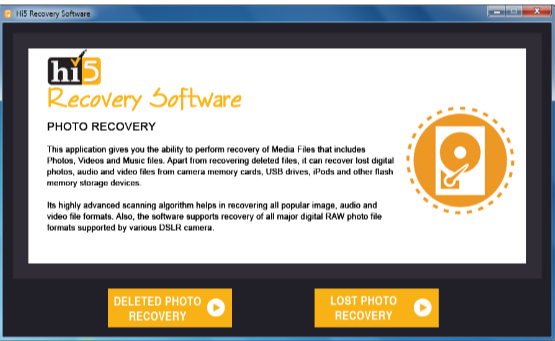
Step 1: The main screen will display the “Partition Recovery” option and the “Formatted / Reformatted Recovery” option

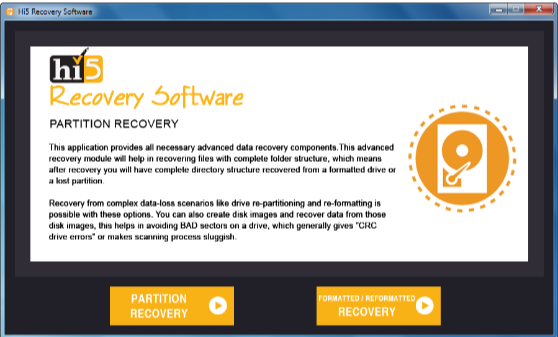
Step  2: Select the “Partition Recovery” option if the partition is deleted, lost, or corrupted

Step  3: In case, if the partition is formatted or reformatted intentionally or unintentionally, then go with the “Formatted / Reformatted Recovery” option

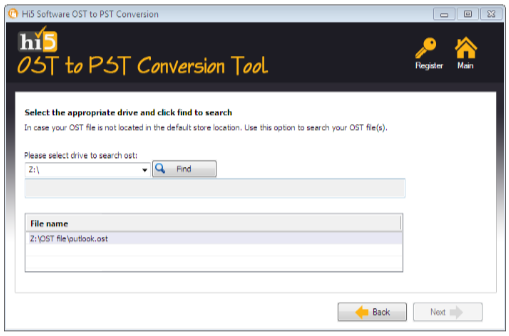
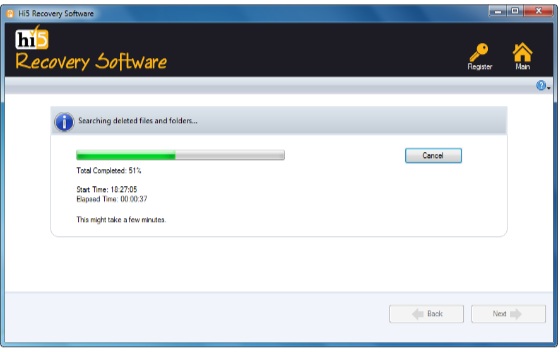
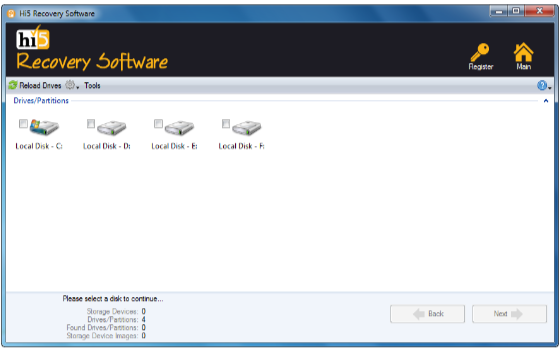
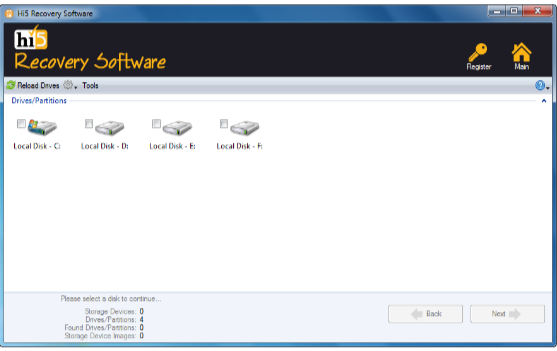
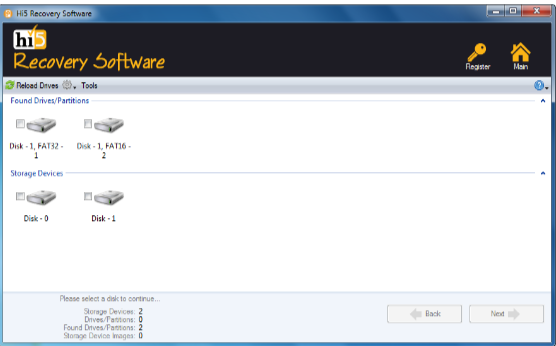
Step  4: Now, select the drive from where you want to recover partitions and go to the “Next” option to start the partition recovery process (Software will display all the available drives present in your system, including externally connected hard drives)

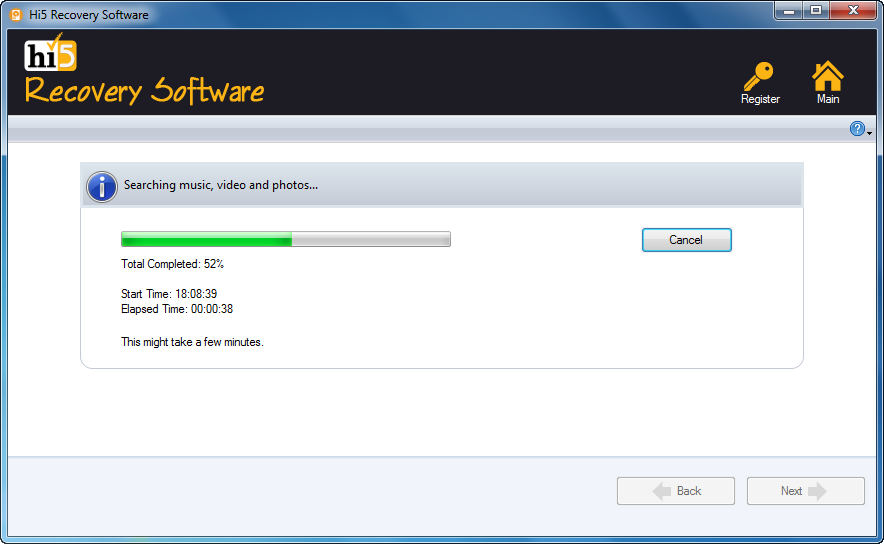
Step  5: The partition will be recovered in a short interval of time

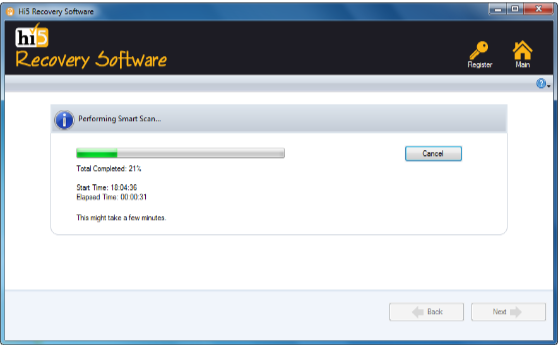
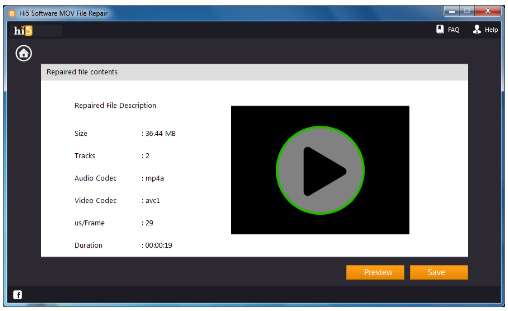
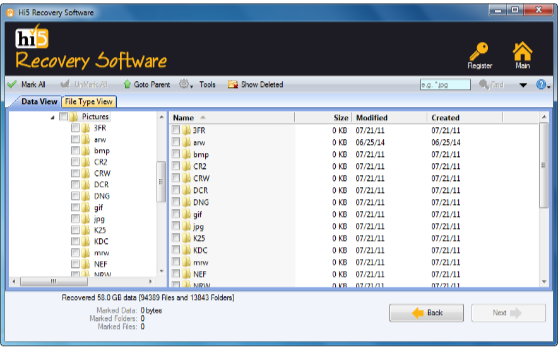
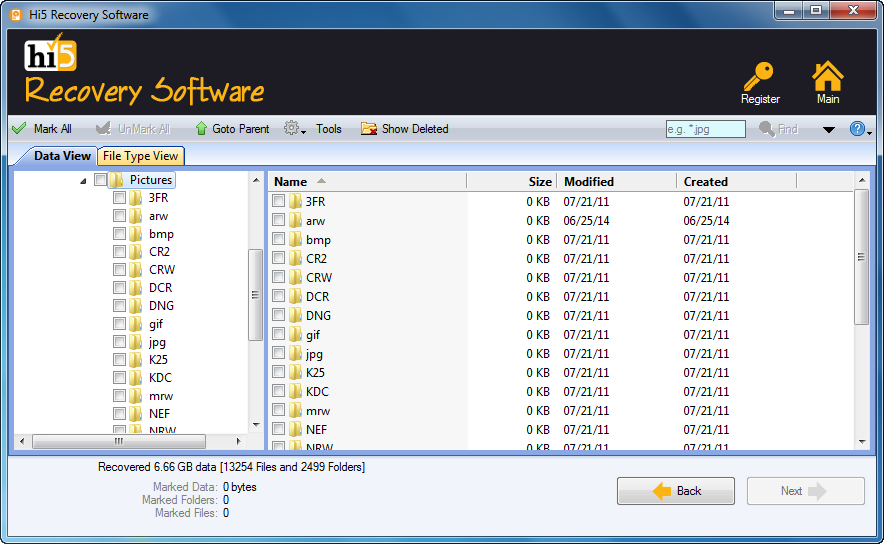
Step  6: Once the recovery process is completed, retrieved partition data will be displayed in the “Data Type” and “File Type” views

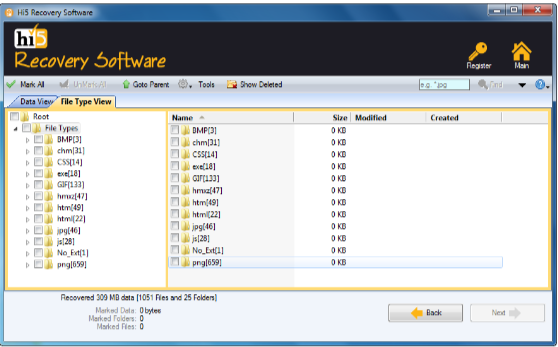
Step 7: you can check recovered partition files using the “Preview” option

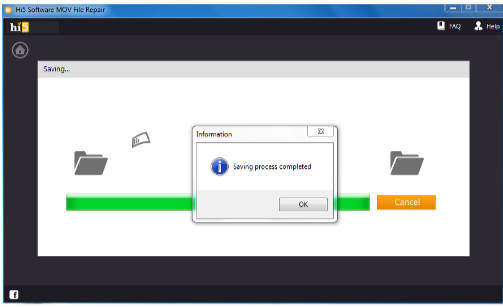
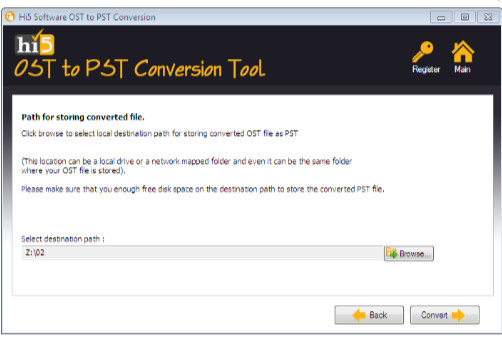
Step 8: Click on the “Save” button to successfully store the recovered data

Tips To Prevent Recover Files From Damaged Hard Drive

Recovering data from a damaged hard drive can be a complex and delicate process. Here are some tips to help you get back to corrupted hard drive recovery:

  • Stop using the hard drive: As soon as you notice your hard drive is corrupt, stop using it immediately. Continued use can cause further damage and make corrupted file recovery more difficult.
  • Try booting from a different drive: If the hard drive contains the operating system and is preventing the computer from booting up, try booting from a different drive. This may allow you to access the files on the corrupt hard drive.
  • Do not attempt DIY repairs: Attempting to repair a damaged hard drive on your own can cause further damage and data loss. It is best to leave the repairs to a professional.

Conclusion:

Here ends our discussion on how do I recover crashed hard drive, Where we have explained some common ways and methods to recover files from a corrupt hard drive, If you’re looking for an easy yet quick way to recover data from a damaged hard drive, We suggest you make use of Hi5 Partition Recovery Tool. If you have any additional questions feel free to drop them in the comment section below.

How To Fix Corrupt Mp4 File?

Worried that your mp4 files are damaged and you have no idea how to repair a damaged mp4 file? Stay calm about this article about how to repair a damaged mp4 file with simple methods. By Using Hi5 MOV File Repair Tool

Download Now

Fixing corrupted mp4 files is the process of attempting to fix mp4 files so that they can be played back normally. mp4 repair tools can become damaged due to various reasons, such as hardware failure, malware attacks, incomplete downloads, sudden power outages, and more. There are several ways to repair MP4 files, including using built-in repair tools in some video players, third-party software, and renaming the file extension.

However, it is important to note that not all mp4 repair tools can be repaired, so it’s crucial to take precautions to avoid file corruption or damage and create backups of important files regularly.

Table of contents:

Why Do MP4 Files Get Damaged?

How To Repair Corrupted MP4?

Steps To Repair MP4 Files

Tips To Prevent Repair Corrupted Mp4 Video Files

Conclusion:

Why Do MP4 Files Get Damaged?

MP4 files can get damaged or corrupted due to a variety of reasons, some of which are:

  • Incomplete downloads: MP4 files that are not downloaded fully or interrupted during the download process can become damaged or corrupt.
  • File system errors: Issues with the file system, such as bad sectors or disk errors, can also cause corrupted video files.
  • Malware infections: Malware or viruses can recover mp4, leading to playback issues or file corruption.
  • Sudden power outages: Abrupt power outages or system crashes during the recording or playback of MP4 files can damage the file.
  • Hardware failure: Hardware issues such as a failing hard drive or corrupted memory card can cause damage to MP4 files.
  • Software conflicts: Conflicts with software or other system components can also cause mp4 repair files to become damaged or corrupted.

How To Repair Corrupted MP4?

Method 1: Repair MP4 File With VLC Player

Yes, it is possible to repair MP4 corrupted files using VLC Player. Here are the steps to do it:

Step 1: Open VLC Player and go to “Media” > “Convert/Save” from the top menu.

Step 2: In the “Open Media” window, click on the “Add” button and select the corrupt MP4 file.

Step 3: Click on the “Convert/Save” button at the bottom of the window.

Step 4: In the “Convert” window, select a destination folder for the repaired file and give it a name.

Step 5: Under “Settings,” choose the “Convert” option and select “Video – H.264 + MP3 (MP4)” as the profile.

Step 6: Click on the “Start” button to begin the conversion process.

Step 7: Once the conversion is complete, try playing the repaired MP4 file in VLC Player or another media player to see if it plays correctly.

Method 2: Repair Corrupted MP4 Files By Changing The MP4 File Extension

Step 1: Right-click on the corrupt MP4 file and select “Rename.”

Step 2: Change the file extension from “.mp4” to “.avi” or “.mov”. For example, if the file name is “corrupt.mp4,” change it to “corrupt.avi” or “corrupt.mov”.

Step 3: A warning message may pop up asking if you’re sure you want to change the file extension. Click “Yes” to confirm the change.

Step 4: Once you have changed the file extension, try playing the file in a media player to see if it plays correctly.

Method 3: Repair MP4 File By Using Hi5 MOV File Repair

Hi5 MOV File Repair is an award-winning tool loved by millions of users across the globe, the tool is user-friendly to make corrupted video file repair easy. You can repair easily your files without any modification. The device is built with powerful algorithms that dive deeper into the petition to repair more than 500 types of files lost due to any reason. It supports all kinds of brands of MOV files that repair. The tool is compatible with all versions of Windows and Mac.

Download Now

Steps To Repair MP4 Files

Step 1:  Download Hi5 MOV File Repair Software on your computer

Step 2: Complete the installation procedure and launch the tool

Step 3: Provide a healthy (working) MOV file using the Healthy File option

Step 4: Now choose your corrupted or unplayable MOV/MP4 file via Corrupted File key

Step 5: Start the repair course by clicking on the Repair button

Step 6: The software starts the scanning and repairing process

Step 7: Once the fix action gets completed you can view the fixed MOV/MP4 video using the Preview option

Step 8: Save the repaired video file in any desired place (except the source location) on your system by clicking on the Save button

Tips To Prevent Repair Corrupted Mp4 Video Files

Here are some tips on how to make corrupted videos playable:

  • Use reliable video capture software: Use reliable video capture software that records videos without any errors or issues.
  • Avoid interruptions during video recording: Ensure there are no interruptions during the video recording process. This includes ensuring there is enough battery power, storage space, and a stable internet connection.
  • Use quality media storage devices: Use quality storage devices like hard drives or solid-state drives to store your videos. Avoid using low-quality or unreliable storage devices that can damage or corrupt your files.
  • Regularly backup your videos: Regularly backup your video files to avoid the risk of data loss in case of corruption or accidental deletion.
  • Scan your computer for viruses and malware: Regularly scan your computer for viruses and malware to avoid any unwanted changes to your video files.
  • Use quality video repair software: If you do encounter corrupted MP4 video files, use quality video repair software to repair them. Avoid using unreliable software that can further damage your files.

Conclusion:

Here we end our discussion on repairing damaged  mp4 files. Where we have explained 6 ways to help you get back damaged files. However, if you are looking for an easy yet quick way to fix corrupted mp4 files. We suggest you make use of the Hi5 MOV File Repair Tool. If you have any additional questions, feel free to drop them in the comment section below.

How Do I Backup My Emails?

Worried that to backup your email from outlook and you have no idea how do I backup my emails? Stay calm about this article about how do I backup my emails with simple methods. By using Hi5 OST To PST Conversion Tool

Download Now

Taking regular backups of your Outlook data is crucial to safeguard your emails, contacts, calendars, and other important information. Backups ensure that you can easily restore your Outlook data in case of data loss, or corruption, or when migrating to a new computer. Here, we’ll discuss some of the best ways to take Outlook backups, providing you with peace of mind and the ability to recover your data when needed.

Microsoft Outlook’s built-in Export feature: Microsoft Outlook offers a built-in Export feature that allows you to create backups of your Outlook data. You can export your emails, contacts, calendars, and other items to a PST (Personal Storage Table) file, which serves as a comprehensive backup. This method is suitable for individual users who want a simple backup solution.

Where is Outlook Email Backup Saved?

Outlook email backups are typically saved in a PST (Personal Storage Table) file format. The specific location where the PST file is saved depends on the version of Outlook and the operating system like : as export pst from office 365, office 365 email backup you are using. Here are the default locations for backup pst files in different versions of Outlook:

  1. Outlook 2019, Outlook 2016, Outlook 2013, and Outlook 2010:
    • Windows 10/8/7/Vista: C:\Users<Username>\Documents\Outlook Files
    • Windows XP: C:\Documents and Settings<Username>\My Documents\Outlook Files
  2. Outlook 2007:
    • Windows 10/8/7/Vista: C:\Users<Username>\AppData\Local\Microsoft\Outlook
    • Windows XP: C:\Documents and Settings<Username>\Local Settings\Application Data\Microsoft\Outlook
  3. Outlook 2003 and earlier:
    • Windows 10/8/7/Vista/XP: C:\Documents and Settings<Username>\Local Settings\Application Data\Microsoft\Outlook

Note: Please note that “<Username>” represents your user account name. However, it’s important to note that the default location can be changed during the setup or configuration of Microsoft outlook backup. Additionally, users can manually choose a different location to save all emails from Outlook.

If you’re unsure about the exact location of your backup email from outlook you can check the Outlook account settings to find the path where the backup pst file is stored. 

Open Outlook.

  • Go to the “File” tab or “Account Settings” (depending on the version of Outlook).
  • Select “Account Settings” or “Data Files” (again, depending on the version).
  • Look for the data file associated with the email account you want to back up. The file path will be displayed next to the file name.

Alternatively, you can use the search function in Windows Explorer or File Explorer to search for files with the Outlook backup file extension to locate your Outlook backup files.

What are The Reasons To Have Backup Email From Outlook

There are several important reasons to have a backup of your email from Outlook:

  • Data Loss Prevention: Email data can be vulnerable to various risks such as accidental deletion, hardware failure, software corruption, viruses, and system crashes. Having a backup ensures that you can recover your important emails, attachments, and contacts in case of data loss.
  • Accidental Deletion: It’s common to accidentally delete important emails or folders. With a backup, you can easily restore these deleted items without permanent loss.
  • Email Recovery: In case of a computer or system failure, having a backup allows you to restore your email data quickly and efficiently, minimizing downtime and ensuring that you can access your important communications without disruption.
  • Migration or Upgrade: When migrating to a new computer, upgrading to a new version of Outlook, or switching to a different email client, having a backup simplifies the transfer of your email data. You can easily import your backup to the new environment and maintain access to your past messages, contacts, and calendar events.
  • Historical Reference: Email backups serve as a historical reference for past communications and attachments. It allows you to retrieve old messages, reference previous conversations, and access important information stored in emails that may no longer be available in your active mailbox.
  • Compliance and Legal Requirements: In certain industries or professions, maintaining email records is mandatory for compliance and legal purposes. Backing up your emails ensures that you meet regulatory requirements and have a record of communication if needed for legal proceedings or audits.
  • Disaster Recovery: Backing up your email data is an essential part of a comprehensive disaster recovery plan. It provides an added layer of protection against unforeseen events such as natural disasters, fires, or theft. With a backup, you can restore your email data and continue your business operations smoothly.
  • Peace of Mind: Knowing that you have a backup of your email data provides peace of mind. It gives you confidence that even in the event of data loss, you have a reliable backup to rely on, reducing stress and potential productivity disruptions.

How Do I Backup My Emails From Outlook

Method 1: Export Outlook Data to Backup OST File

To export Outlook data to a backup OST file, follow these steps:

Step 1: Open Outlook and click on the “File” tab.

Step 2: Select “Open & Export” and then click on “Import/Export.”

Step 3: In the “Import and Export Wizard,” select “Export to a file” and then click on “Next.”

Step 4: Choose “Outlook Data File (.pst)” and click on “Next.”

Step 5: Select the folder you want to export, such as your Inbox or Sent Items, and then click on “Next.”

Step 6: Choose the location where you want to save the backup OST file and enter a name for it.

Step 7: Click on “Finish” to complete the export process.

Method 2: Archive Outlook Folders to Backup OST File

To archive Outlook folders to a backup OST file, follow these steps:

Step 1: Open Outlook and click on the “File” tab.

Step 2: Click on “Options” and then select “Advanced.”

Step 3: Under the “AutoArchive” section, click on “AutoArchive Settings.”

Step 4: In the “AutoArchive” window, select the “Archive this folder using these settings” option.

Step 5: Select the folder you want to archive, and set the archive options such as the archive period and the location of the archive file.

Step 6: Choose “Outlook Data File (.pst)” as the file type and click on “Browse” to select a location for the backup OST file.

Step 7: Enter a name for the backup OST file, click on “OK,” and then click on “Finish.”

Method 3: Create a New PST File

To create a new PST file in Outlook, follow these steps:

Step 1: Open Outlook and click on the “File” tab.

Step 2: Click on “New” and then select “Outlook Data File.”

Step 3: In the “New Outlook Data File” window, select “Outlook Data File (.pst)” and click on “OK.”

Step 4: In the “Create or Open Outlook Data File” window, select the location where you want to save the PST file, enter a name for the file, and click on “OK.”

Step 5: In the “Create Microsoft Personal Folders” window, enter a display name for the new PST file, if needed.

Step 6: Choose whether you want to set a password for the PST file or not, and click on “OK.”

Step 7: The new PST file will now be listed in the navigation pane on the left side of the Outlook window.

Method 4: Have A Backup Email From Outlook Using Hi5 OST To OST Conversion

Hi5 OST To OST Conversion is an award-winning tool loved by millions of users across the globe, the tool is user-friendly to have Outlook backup extremely easy. You can back up your files, and data,  photos easily your files without any modification. The tool is built with powerful algorithms that dive deeper into the petition to have backup up to more than 500 types of files lost due to any reason It supports all kinds of Outlook backups such as Office 365 Outlook backup, outlook 2010 export pst, backing up emails from outlook 365, etc. The tool is compatible with all versions of Windows and Mac.

Download Now

Steps To Backup Email From Outlook

Step 1: Download Hi5 OST to PST Conversion Software on your system

Step 2: Double-click on the downloaded icon and complete the installation process

Step 3: Once the software is installed successfully and launched on your system, then on the first screen you can see these three options

  • Open OST File – Click on this option if you know the path of the OST File
  • Find OST File – If you’re not aware of the OST file location, then click on this option

Step 4: After selecting the appropriate option in Step 3, using the “Browse” option select the folder path where exactly you want to save the converted file

Step 5: Click on “Next” option to start the conversion process

Step 6: Once the OST file is converted, you can see the message saying ‘ost file conversion completed’

Step 7: Now, you will have a PST file containing all file attributes that were in the OST file. You can now import this file in Outlook to access it as a PST file

Useful Tips To Have Backup Email From Outlook

  • Regularly Back Up Your Email
  • Use Automated Backup Solutions
  • Enable Archiving
  • Store Backups in Multiple Locations
  • Encrypt and Password Protect Backups
  • Test and Verify Backups
  • Document Backup Procedures
  • Keep Backup Software Up to Date

Conclusion: 

Here we end our discussion on having backup emails from Outlook such as exporting pst files from Outlook, exporting pst files, and Outlook how to backup emails where we have explained 8 ways to help you get back deleted Outlook files. However, if you are looking for an easy yet quick way to back up your Outlook data. We suggest you make use of the Hi5 OST To PST Conversion Tool. If you have any additional questions regarding this article, feel free to drop them in the comment section below.

How To Recover Permanently Deleted Files From C Drive?

Worried that your deleted files from C drive need to be recovered and you have no idea How do I recover permanently deleted files from my C drive? Do not worry about this article about accidentally deleting c drives files with simple methods. By using Hi5 Partition Recovery Tool

Download NowDownload Now

Accidentally deleting c drive files from your computer can be a distressing experience. However, there is hope for recovering those c drive deleted files. When files are deleted from the C drive, they are not immediately erased from the hard drive. Instead, the space they occupied is marked as available for reuse. This means that with the right tools and techniques, it’s possible to recover deleted files from the C drive.

To recover deleted files from the C drive, it is recommended to follow a series of steps. First, stop using the C drive immediately to minimize the risk of overwriting the deleted files. Next, install reputable file recovery software on a different drive or external storage device to avoid overwriting data on the C drive.

What Happens If I Delete Everything in My C Drive?

  • Loss of Operating System: Deleting everything on the C drive will remove the operating system files, rendering your computer unable to boot up. Without an operating system, your computer will not function properly, and you won’t be able to use it until you reinstall the operating system.
  • Data Loss: Deleting everything on the C drive will also result in the loss of all data stored on that drive. This includes personal files, documents, photos, videos, and any other data that you saved on the C drive. It’s important to note that deleting files from the Recycle Bin or formatting the C drive will make the data harder to recover.
  • Program and Application Loss: When you delete everything on the C drive, you will lose all the installed programs and applications stored on that drive. This means you will need to reinstall all of your software, including productivity tools, games, and any other programs you regularly use.
  • System Instability: Deleting system files from the C drive can lead to system instability and errors. The operating system relies on specific files and configurations to function correctly. Removing these files can cause crashes, errors, and unpredictable behavior.
  • Inoperable Computer: Ultimately, if you delete everything on the C drive without proper backup or recovery options, your computer may become inoperable until you reinstall the operating system and restore your data from backups.

How To Recover Permanently Deleted Files From C Drive?

Method 1: Recover C Drive Deleted Files Using Recycle Bin

Recovering deleted files from the C drive using the Recycle Bin is possible if the files haven’t been permanently deleted or if the Recycle Bin hasn’t been emptied. Here’s how you can recover files using the Recycle Bin:

Step 1: Open the Recycle Bin: Double-click on the Recycle Bin icon on your desktop. This will open a window displaying the deleted files and folders stored in the Recycle Bin.

Step 2: Locate the deleted files: Look for the files or folders you want to recover. You can scroll through the list or use the search bar at the top-right corner to search for specific files.

Step 3: Select the files for recovery: Once you’ve found the files you want to recover, you can either right-click on each file and select “Restore” or select multiple files and click on the “Restore the selected items” option in the toolbar. This action will restore the files to their original location on the C drive.

Step 4: Check the restored files: After the restoration process, navigate to the original location of the files on the C drive to ensure that they have been successfully recovered.

Method 2: Recover C Drive Deleted Files Using Previous Version

Step 1: Right-click on the folder where the deleted files were originally on the C drive.

Step  2: Select “Restore previous versions” from the context menu. This will open the Properties window for that folder.

Step  3: In the Properties window, navigate to the “Previous Versions” tab.

Step  4: Here, you’ll see a list of available previous versions of the folder. Each version represents a snapshot taken by Windows at a specific point in time.

Step 5: Select the most recent version that contains the deleted files or the version closest to the date when the files were present.

Step  6: Click on the “Restore” button to restore the selected previous version of the folder.

Step  7: Windows will prompt you to choose a location to restore the folder. Select a location other than the original location on the C drive to avoid overwriting any existing data.

Step  8: After selecting the restore location, click “Restore” to initiate the restoration process.

Step  9: Once the restoration is complete, navigate to the selected restore location to access the recovered files.

Method 3: Recover C Drive Deleted Files Using One Drive

Step 1: Open the OneDrive website go to the OneDrive website (https://onedrive.live.com) and sign in with your Microsoft account associated with OneDrive.

Step 2: Navigate to the “Recycle Bin” folder on the OneDrive website, and click on the “Recycle bin” option in the left sidebar. This will open the Recycle Bin folder where deleted files from your OneDrive are stored.

Step  3: Search for the deleted files: In the Recycle Bin folder, you can scroll through the list of deleted files or use the search bar at the top-right corner to search for specific files.

Step  4: Select the files for recovery once you find the files you want to recover, you can either right-click on each file and select “Restore” or select multiple files and click on the “Restore” button in the toolbar. This action will restore the files to their original location on OneDrive and, consequently, on your C drive.

Step 5: Check the restored files after the restoration process, and navigate to the original location of the files on your OneDrive or the synced OneDrive folder on your C drive to ensure that they have been successfully recovered.

Method 4: Recover Deleted Files From C Drive Using Hi5 File Recovery

Hi5 File Recovery is an award-winning tool loved by millions of users across the globe, the tool is user-friendly to make recovering deleted files from Windows 10 updates extremely easy. You can restore easily your files without any modification. The tool is built with powerful algorithms that dive deeper into the petition to recover more than 280 types of files lost due to any reason It supports all kinds of brands of windows. The tool is compatible with all versions of Windows and Mac.

Download NowDownload Now

Steps To Recover Deleted Files From C Drive

Step 1: Download and install Hi5 File Recovery Tool on your desktop.

Step 2: Then you will get the two main windows, Deleted File Recovery option, and Lost File Recovery.

Step 3: Select the appropriate option based on your situation.

Step 4: The software will ask you to Select the drive from where you want to recover files.

Step 5: Choose the drive and click on the Next option to initiate the file Recovery process.

Step 6: Wait for a while.

Step 7: Once the data recovery process is completed, you can view recovered files using the Preview option.

Step 8: Click on the Save option to save retrieved files on any desired location

Tips To Prevent Recover Deleted Files From C Drive

  • Permanent Deletion 
  •  Encryption
  • Disable File History and System Restore
  • Disk Formatting
  • Secure Disposal

Conclusion: 

Here we end our discussion on recovering permanently deleted files from C drive. Where we have explained 6 ways to help you get back deleted files from C drive. However, if you are looking for an easy yet quick way to retrieve deleted files from C drive. We suggest you make use of the Hi5 File Recovery Tool. If you have any additional questions, feel free to drop them in the comment section below.

How Do I Find Missing Files in Windows XP?

Worried that your files are deleted from your windows xp and you have no idea how to restore deleted files to windows xp? Do not worry about this article about how do I find missing files in windows xp with simple methods. Using Hi5 File Recovery Tool

Download NowDownload Now

Recovering deleted files from Windows XP can be a critical task when important data is accidentally or mistakenly removed from a computer running the Windows XP operating system. Windows XP, although an older version of Windows, still holds value for users who rely on it for their computing needs. Understanding how do I recover permanently deleted files in Windows can help salvage lost data and mitigate potential losses.

Windows XP provides several methods and tools for file recovery win xp, but it’s important to note that successful recovery depends on various factors, such as the duration since the deletion, disk usage, and the actions taken after file deletion. While the process may not be as streamlined as in more recent Windows versions, the basic principles remain the same.

Source: Reddit

Possible Reason Behind Recover Deleted Files From Windows XP

There can be several reasons why someone may need to restore deleted files from Windows XP. Here are some reasons to find deleted files in windows xp

  • Accidental deletion: The most common reason for file recovery is accidental deletion. It’s easy to mistakenly delete files or folders, especially when performing tasks like cleaning up disk space or organizing files. If important files are deleted unintentionally, file recovery becomes necessary to retrieve them.
  • System crash or software malfunction: Windows XP systems can experience crashes or software malfunctions that may result in file deletion. This can occur due to various reasons, such as power outages, hardware failures, software conflicts, or malware infections. In such cases, file recovery is essential to retrieve the lost data.
  • Formatting or partitioning errors: Formatting a drive or partitioning it incorrectly can lead to the loss of all data stored on that drive or partition. If a Windows XP user accidentally formats a drive or encounters errors during the partitioning process, they may end up deleting all files stored on the affected drive. File recovery win xp becomes necessary to restore the lost data.
  • Virus or malware attacks: Windows XP systems are susceptible to virus and malware attacks, especially since the operating system is no longer supported by regular security updates. Malicious software can corrupt files, delete them, or move them to hidden locations. Recovering deleted files is crucial in such situations to retrieve the compromised or missing data.
  • User error or negligence: Human error or negligence can also lead to file deletion. This could include mistakenly emptying the Recycle Bin without checking its contents, using shift+delete to bypass the Recycle Bin, or deleting files from external storage devices without proper backup. File recovery helps recover files lost due to user error or negligence.

How To Recover Permanently Deleted Files From Windows XP?

Method 1: Recover Deleted Files From Recycle Bin Windows XP

Step 1: Locate the Recycle Bin icon on your desktop, typically represented by a wastebasket or trash can.

Step 2: Double-click on the Recycle Bin icon to open the Recycle Bin window. This window will display a list of deleted files and folders.

Step 3: Browse through the deleted files and folders to find the ones you want to restore. You can scroll through the list or use the search bar at the top-right corner to search for specific files.

Step 4: Once you locate the files you want to restore, right-click on each file and select “Restore” from the context menu. Alternatively, you can select multiple files by holding down the Ctrl key while clicking on the desired files, and then right-clicking and selecting “Restore” to restore all selected files at once.

Step 5: The restored files will be returned to their original location before they were deleted. If the original location no longer exists or has been modified, the files will be restored to the closest available location.

Method 2: Restore Files From Windows XP Using Previous Version 

To restore files from a previous version using Windows XP, you can follow these steps:

Step 1: Navigate to the folder or location where the deleted or modified file was originally located.

Step 2: Right-click on the folder and select “Properties” from the context menu.

Step 3: In the Properties window, go to the “Previous Versions” tab.

Step 4: A list of available previous versions of the folder or file will be displayed. Note that this feature relies on the System Restore functionality, so there may not be available previous versions for all files or folders.

Step 5: Select the desired previous version from the list and click on the “Open” or “Restore” button.

Step 6: A new window will open showing the contents of the selected previous version. You can browse the files and folders within it.

Step 7: To restore a specific file, simply copy and paste it to a desired location on your computer or drag it to another folder.

Step 8: If you want to restore the entire folder, copy and paste the folder along with its contents to the desired location.

Method 3: Recover Deleted Files From Windows XP Using Hi5 File Recovery Tool

Hi5 File Recovery is an award-winning tool loved by millions of users across the globe, the tool is user-friendly to make the recovery of data from Windows XP extremely easy. You can restore deleted files in Windows XP without any modification. The device is built with powerful algorithms that dive deeper into the petition to recover more than 280 types of files lost due to any reason It supports all kinds of brands of windows. The tool is compatible with all versions of Windows and Mac.

Download NowDownload Now

Steps To Recover Deleted Files From Windows XP

Step 1: Download and install Hi5 File Recovery Tool on your desktop.

Step 2: Then you will get the two main windows, Deleted File Recovery option, and Lost File Recovery.

Step 3: Select the appropriate option based on the situation you are facing.

Step 4: The software will ask you to Select the drive from where you want to recover files.

Step 5: Choose the drive and click on the Next option to initiate the file Recovery process.

Step 6: Wait for a while.

Step 7: Once the data recovery process is completed, you can view recovered files using the Preview option.

Step 8: Click on the Save option to save retrieved files on any desired location

Tips To Prevent Data Loss For Windows XP

  • Regularly backup your data
  • Enable System Restore
  • Use reliable antivirus software
  • Keep your operating system updated
  • Be cautious with email attachments and downloads
  • Use surge protectors and backup power
  • Be careful when deleting files

Conclusion:

Here we end our discussion on recovering deleted files from windows xp. Where we have explained 6 ways to help you get back permanently deleted files from windows xp. However, if you are looking for an easy yet quick way to retrieve deleted files from windows xp. We suggest you make use of the Hi5 File Recovery Tool. If you have any additional questions regarding this article,  feel free to drop them in the comment section below.

How do I fix MP4 with VLC?

Worried that your vlc cannot open mp4 and you have no idea how do I fix mp4 with vlc? Do not worry about this article about how to play vlc mp4 video files with simple methods. Using Hi5 MOV File Repair Tool

Download Now

VLC Media Player is a popular and versatile multimedia player that supports a wide range of audio and video file formats. However, there may be instances where VLC cannot play MP4 videos, which can be frustrating for users who rely on VLC for their media playback needs.

When VLC encounters difficulties playing MP4 videos, it can be attributed to various factors. Some common reasons include corrupted or damaged MP4 files, missing or incompatible codecs, DRM-protected content, or incomplete downloads. These issues can prevent VLC from properly decoding and playing MP4 videos.

To address this problem, it is important to troubleshoot and identify the specific cause. This often involves updating VLC to the latest version, installing necessary codecs, repairing or converting the MP4 files, or trying alternative media players that may handle the videos more effectively.

Reasons Why MP4 Video is Not Playing in Vlc?

There are several reasons why mp4 video is not playing in vlc Media Player. Some common reasons include:

  • Corrupted or Damaged File: The MP4 video file may be corrupted or damaged, which can occur during the file download, transfer, or encoding process. Corruption or damage can prevent VLC from properly decoding and playing the video.
  • Incomplete Download: If the MP4 video file is not fully downloaded or is incomplete, VLC may struggle to play it. In such cases, the video file needs to be downloaded again or obtained in its complete form.
  • Codec Issues: VLC relies on codecs to decode and play different video formats. If the required codec to play the MP4 video is missing, outdated, or incompatible, VLC may encounter difficulties in playing the video. This can be resolved by installing the necessary codecs or codec packs.
  • DRM Protection: MP4 videos with Digital Rights Management (DRM) protection may not be playable in VLC. DRM restricts the usage of copyrighted content and can prevent playback on unauthorized devices or software.
  • Outdated VLC Version: An outdated version of VLC may lack support for certain codecs or have bugs that affect the playback of MP4 videos. Updating VLC to the latest version can help resolve compatibility issues.
  • Operating System Compatibility: In some cases, the operating system on which VLC is running may not be compatible with certain MP4 video files. This can occur if the video is encoded using a newer codec or technology that is not supported by the operating system.
  • Hardware Acceleration Issues: VLC uses hardware acceleration to enhance video playback performance. However, hardware acceleration can sometimes cause conflicts or compatibility issues with certain MP4 videos, leading to playback problems.

How do I fix MP4 with VLC?

Method 1: Upgrade VLC to the Latest Version to Fix the MP4 File Won’t Play

If you are experiencing issues with playing MP4 files in VLC and the current version you have installed is outdated, upgrading VLC to the latest version can often help resolve the problem. Here’s how you can upgrade VLC:

Step 1: Open VLC Media Player on your computer.

Step 2: Click on the “Help” option in the menu bar at the top of the VLC window.

Step 3: From the drop-down menu, select “Check for Updates.”

Step 4: VLC will then check for available updates. If an update is found, it will prompt you to download and install the latest version.

Step 5: Follow the on-screen instructions to download and install the updated version of VLC.

Step 6: Once the installation is complete, restart VLC and try playing your MP4 file again.

Method 2: Disable hardware video decoding in VLC

If you’re experiencing issues with video playback in VLC Media Player and suspect that hardware video decoding might be the cause, you can try disabling it. Here’s how to disable hardware video decoding in VLC:

Step 1: Open VLC Media Player on your computer.

Step 2: Click on the “Tools” option in the menu bar at the top of the VLC window.

Step 3: From the drop-down menu, select “Preferences” (or “Advanced Preferences” in some versions).

Step 4: In the Preferences window, make sure the “Simple” or “All” radio button is selected at the bottom left corner to display all settings.

Step 5: Navigate to the “Input/Codecs” tab.

Step 6: Under the “Codecs” section, look for the “Hardware-accelerated decoding” option.

Step 7: By default, this option is set to “Automatic.” Change it to “Disable” or “Software decoding” to turn off hardware acceleration.

Step 8: Click on the “Save” button at the bottom right corner to apply the changes.

Step 9: Restart VLC Media Player for the changes to take effect.

Method 3: Fix MP4 Video Not Playing in Vlc Using Hi5 MOV File Repair Tool.

 Hi5 MOV File Repair is an award-winning tool loved by millions of users across the globe, the tool is user-friendly to make VLC cant play mp4 easy. You can repair easily your files without any modification. The tool is built with powerful algorithms that dive deeper into the petition to repair more than 500 types of files lost due to any reason. It supports all kinds of brands of MOV files that repair. The tool is compatible with all versions of Windows and Mac. 

Download Now

Steps To Fix Vlc cant play mp4

Step 1:  Download Hi5 MOV File Repair Software on your computer

Step 2: Complete the installation procedure and launch the tool

Step 3: Provide a healthy (working) MOV file using the Healthy File option

Step 4: Now choose your corrupted or unplayable MOV/MP4 file via Corrupted File key

Step 5: Start the repair course by clicking on the Repair button

Step 6: The software starts the scanning and repairing process

Step 7: Once the fix action gets completed you can view the fixed MOV/MP4 video using the Preview option

Step 8: Save the repaired video file in any desired place (except the source location) on your system by clicking on the Save button

Tips To Play MP4 Videos In vlc

  • Update VLC
  • Install Codecs
  • Check File Integrity
  • Restart VLC
  • Adjust Video Output Settings
  • Clear VLC Cache

Conclusion:

Here we end our discussion on vlc can t play mp4. Where we have explained 7 ways to help you get back mp4 video not playing in vlc. However, if you are looking for an easy yet quick way to fix can t play mp4 video. We suggest you make use of the Hi5 MOV File Repair Tool. If you have any additional questions, feel free to drop them in the comment section below.

How To Restore Permanently Deleted Files From Recycle Bin?

Worried that your files are deleted from recycle bin and you have no idea how to recover your deleted file? Do not worry about this article about how to recover data from your recycle bin with simple methods. Using Hi5 File Recovery Tool

Recycle Bin is a place that temporarily stores deleted objects in Windows until they are deleted permanently. It helps users to restore deleted files from Windows 95 in Windows operating systems.

In Windows, the Recycle Bin is a folder or directory where deleted items are temporarily stored. Deleted files are not permanently removed from the hard drive but are sent instead to the Recycle Bin unless they are too large. The files in the Recycle Bin can be restored to their original location.

Table of contents:

Can You Recover Files Deleted From Recycle Bin?

How To Restore Permanently Deleted Files From Recycle Bin?

Steps To Retrieve Deleted Files From Recycle Bin

Useful To Tips To Retrieve Deleted Files From Recycle Bin

Conclusion:

Can You Recover Files Deleted From Recycle Bin?

Yes it is possible to recover files from recycle bin, Here are some reasons for recycle bin recovery:

  • Emptying the Recycle Bin: If you manually empty the Recycle Bin, or if the Recycle Bin is set to automatically delete files after a certain period of time, the files within the Recycle Bin will be permanently deleted, and you won’t be able to recover them through the Recycle Bin.
  • Bypassing the Recycle Bin: If you delete a file by pressing the “Shift” key while deleting, the file will not be moved to the Recycle Bin and will be permanently deleted.
  • Overwriting deleted files: If new data is written to the location where a deleted file was stored, it can overwrite the deleted file. When this happens, the deleted file becomes unrecoverable.
  • Corruption of the Recycle Bin: The Recycle Bin itself can become corrupted due to various reasons, including system errors, virus or malware infections, or other issues. In such cases, the Recycle Bin may not function properly, or the files within the Recycle Bin may become inaccessible.
  • Storage device failure: If the storage device containing the Recycle Bin fails or becomes damaged, the files stored within it may be lost or become inaccessible.

How To Restore Permanently Deleted Files From Recycle Bin?

Method 1: Retrieve Deleted Files From Recycle Bin using the Previous Version

To restore recycle bin using the Previous Version feature, you can follow these steps:

Step 1: Right-click on the folder that contained the deleted files and select “Properties” from the drop-down menu.

Step 2: In the Properties window, select the “Previous Versions” tab.

Step 3: You will see a list of previous versions of the folder. Select the most recent version that contains the deleted files and click “Open” to view the contents of the folder.

Step 4: If you see the deleted files in the folder, select them and copy them to a new location on your computer.

Step 5: If you do not see the deleted files in the folder, repeat the process with an earlier version of the folder until you find a version that contains the deleted files.

Method 2: Restore Deleted Files From Recycle Bin By Taking Backup

To restore deleted files from the Recycle Bin by taking a backup, you can follow these steps:

Step 1:Open the folder where you had stored the backup files.

Step 2: Locate the backup file that contains the deleted files.

Step 3:  Double-click on the backup file to open it.

Step 4:  Browse the backup file to find the deleted files that you want to restore.

Step 5:  Once you have located the deleted files, right-click on them and select “Copy” or “Cut.”

Step 6:  Go to the location where you want to restore the files and right-click on an empty space. Select “Paste” to restore the files.

Method 3: Recover Permanently Deleted Files From the Recycle Bin By Using Command Prompt

You can try to recover permanently deleted files from the Recycle Bin by using Command Prompt. Here are the steps:

Step 1: Open Command Prompt: Press the Windows key + R to open the Run dialog box. Type “cmd” and press Enter.

Step 2: Type “chkdsk /f X:” into the Command Prompt, where “X” is the drive letter of the partition that contains the deleted files. Press Enter.

Step 3: Type “Y” and press Enter when prompted to schedule a disk check for the next time you restart your computer.

Step 4: Restart your computer: The disk check will run when your computer restarts.

Step 5: Open Command Prompt again and Press the Windows key + R to open the Run dialog box. Type “cmd” and press Enter.

Step 6: Type “cd $RECYCLE.BIN” and press Enter. This will take you to the Recycle Bin folder.

Step 7: Type “dir /a” and press Enter. This will display a list of all files in the Recycle Bin, including deleted files.

Step 8: Identify the deleted files: Look for the files that you want to recover in the list. Note down the name and extension of the files.

Step 9: Type “copy [filename]. [extension] [destination]” and press Enter, where “[filename]” is the name of the deleted file, “[extension]” is the file extension, and “[destination]” is the location where you want to save the recovered file.

Step 10: Press Enter to copy the file to the destination location.

Method4: Recover Deleted Files From Recycle Bin Using Hi5 File Recovery Tool

Hi5 File Recovery is an award-winning tool loved by millions of users across the globe, the tool is user-friendly to make recovering deleted files from recycle bin extremely easy. You can restore easily your files without any modification. The tool is built with powerful algorithms that dive deeper into the petition to recover more than 280 types of files lost due to any reason. The tool is compatible with all versions of Windows and Mac.

Download NowDownload Now

Steps To Retrieve Deleted Files From Recycle Bin

Step 1: Download and Install Hi5 Software File Recovery Tool on your Windows System

Step 2: The page will be redirected to the main window, which shows two main options “Deleted File Recovery” option and “Lost File Recovery” 

Step 3: Select the appropriate option based on the situation you’re facing

Step 4: The software will ask you to select the drive from where you’re willing to recover files/data

Step 5: Choose the drive and click on the “Next” option to initiate the file recovery process

Step 6: Wait for some time…

Step 7: Once the data recovery process is completed, you can view recovered files using the “Preview” option

Step 8: Click on the “Save” option to save retrieved files on any desired location

Useful To Tips To Retrieve Deleted Files From Recycle Bin

  • Check other folders
  • Search for the file
  • Use file recovery software
  • Act quickly
  • Use cloud storage
  • Check backups

Conclusion:

Here we end our discussion on recycle bin recovery. Where we have explained 6 ways to help you get back deleted files from recycle bin. However, if you are looking for an easy yet quick way, how to retrieve deleted files from recycle bin. We suggest you make use of the Hi5 File Recovery Tool. If you have any additional questions, feel free to drop them in the comment section below.

How To Recover Notepad Text Files On Windows 10?

Worried that your notepad files are been deleted from Windows 10 and you have no idea How do I recover a .txt file? Do not worry about this article about how to recover notepad text files on windows 10 By using Hi5 File Recovery Tool

Download NowDownload Now

Notepad is a simple text editor application that comes pre-installed on Windows 10. It allows users to create and edit plain text files. However, if a Notepad text file is accidentally deleted or lost due to a system error, it can be frustrating to recover it. Fortunately, there are several methods you can use to recover a lost Notepad text file on Windows 10.

These methods include checking the Recycle Bin, looking for backups, using File History, and using a file recovery tool. Checking the Recycle Bin is the easiest method and involves simply opening the Recycle Bin and looking for the file. If the file is there, it can be easily restored. Looking for backups involves checking for files with the “.bak” or “.tmp” extensions in the folder where the file was saved.

Symptoms To Recover Files From Notepad On Windows 10

The symptoms of a lost or corrupted Notepad file on Windows 10 can include:

  • Unable to locate the Notepad file on your computer: If you cannot find the Notepad file in the folder where it was saved, it may have been accidentally deleted or moved to another location.
  • Error messages: If you try to open a Notepad file and receive an error message, it could indicate that the file has been corrupted or damaged.
  • Unsaved changes: If your computer crashes while you are editing a Notepad file, any unsaved changes will be lost.
  • Overwritten files: If you have saved a new file with the same name as an existing Notepad file, the new file may overwrite the old one, causing it to be lost.
  • Inaccessible files: If you are unable to open a Notepad file or access its contents, it may have been corrupted or damaged.

How To Recover Notepad Text Files On Windows 10?

Method 1: Recover Files From Notepad On Windows 10 By Using Recycle Bin

Step 1: Go to the Windows desktop and double-click on the Recycle Bin icon.

Step 2: Look for the Notepad file that you want to recover. If you have trouble finding it, you can use the search bar in the Recycle Bin to look for it.

Step 3: Once you have located the file, right-click on it and select “Restore” from the context menu.

Step 4: The Notepad file will be restored to its original location. If you don’t remember where the file was saved, you can use the Windows search bar to look for it.

Method 2: Recover Deleted Notepad Text Files On Windows 10 By Using File History

Step 1: Click on the Windows “Start” button and select “Settings” (the gear icon).

Step 2: In the Settings window, click on “Update & Security”.

Step 3: In the left pane of the Update & Security window, click on “Backup”.

Step 4: Under the “Back up using File History” section, click on “More options”

Step 5: Scroll down to the “Restore files from a current backup” section and click on “Restore files”.

Step 6: Use the search bar to look for the Notepad file that you want to recover. You can also use the arrows on the right side of the screen to navigate through the backups.

Step 7: Once you have located the file, select it and click on the “Restore” button.

Step 8: The Notepad file will be restored to its original location. If you don’t remember where the file was saved, you can use the Windows search bar to look for it.

Method 3: Retrieve Notepad Text Files on Windows 10 By Using System Restore

Step 1: Click on the Windows “Start” button and type “system restore” in the search bar. Select “Create a restore point” from the results.

Step 2: In the System Properties window, click on the “System Protection” tab.

Step 3: Click on the “System Restore” button.

Step 4: In the System Restore window, click on “Next”.

Step 5:  Select a restore point that was created before the Notepad file was lost or corrupted.

Step 6: Click on “Next” and then click on “Finish”.

Step 7: Confirm that you want to start the System Restore process by clicking on “Yes”.

Step 8: Wait for the process to complete. This may take some time.

Step 9: Once the System Restore process is complete, check to see if the Notepad file has been restored.

Method 4: Restore Notepad Text Files On Windows 10 By Using Hi5 File Recovery Tool

Hi5 File Recovery is an award-winning tool loved by millions of users across the globe, the tool is user-friendly to make restoring Notepad files from Windows 10 extremely easy. You can restore easily your files without any modification. The tool is built with powerful algorithms that dive deeper into the petition to recover more than 280 types of files lost due to any reason. The tool is compatible with all versions of Windows and Mac.

Download NowDownload Now

Steps To Recover Notepad Text Files On Windows 10 

Step 1:Download and install Hi5 File Recovery Tool on your desktop.

Step 2: Then you will get the two main windows, Deleted File Recovery option, and Lost File Recovery.

Step 3: Select the appropriate option based on the situation you are facing.

Step 4: The software will ask you to Select the drive from where you want to recover files.

Step 5: Choose the drive and click on the Next option to initiate the file Recovery process.

Step 6: Wait for a while.

Step 7: Once the data recovery process is completed, you can view recovered files using the Preview option.

Step 8: Click on the Save option to save retrieved files in any desired location

Tips To Prevent Notepad files From Windows 10

  • Save frequently: Make it a habit to save your Notepad files frequently while working on them. This ensures that even if the program crashes or your computer shuts down unexpectedly, you won’t lose much of your work.
  • Use file backup solutions: Use backup solutions like File History or OneDrive to regularly back up your files to prevent data loss in case of a computer failure or damage.
  • Keep your computer up-to-date: Regularly update your computer with the latest security patches and software updates. This can prevent issues that could cause your Notepad files to be lost or damaged.
  • Use anti-virus software: Install and use an anti-virus program to protect your computer from viruses and malware that could damage or delete your Notepad files.
  • Avoid shutting down your computer improperly: Always shut down your computer properly, either by clicking on the “Start” button and selecting “Shut down” or by pressing the power button and selecting “Shut down”. Avoid abruptly turning off the power or unplugging your computer, as this could cause Notepad files to be lost or corrupted.
  • Avoid editing system files: Avoid editing system files or any files related to the operating system, as this could cause your computer to malfunction and cause data loss, including Notepad files.

Conclusion:

Here we end our discussion on retrieving notepad text files from Windows 10. Where we have explained 5 ways to help you get back your notepad files. However, if you are looking for an easy yet quick way to recover deleted files from Notepad on Windows 10. We suggest you make use of the Hi5 File Recovery Tool. If you have any additional questions, feel free to drop them in the comment section below.

How To Recover Deleted Files From a Server

Worried that your Windows server file recovery is deleted and you have no idea how to recover your deleted files? Do not worry about this article about how to recover deleted folders from servers with simple methods. By using Hi5 File Recovery Tool

Introduction:

Windows Server file recovery is a brand name for a group of server operating systems released by Microsoft. This server is designed to share services with multiple users and provide extensive administrative control of data storage, data management, applications, and corporate networks.

Since April 2003, when Windows Server 2003 was released, Microsoft has marketed Windows Server like a  brand. Server versions of Windows were available even before this. Windows NT 4.0, for example, was offered in both desktop (general purpose) and server variants.

Microsoft Windows Servers are one of the best and most widely used Server Operating systems. According to a report by Grand View Research, Microsoft currently owns 55% of the Server Operating system market, and the number is projected to grow every year.

Can You Recover Deleted Files From a Server

  • Accidental deletion: One of the most common reasons for file deletion is accidental deletion by the user. If important files are deleted unintentionally, recovering them can prevent data loss and avoid disruption to your workflow.
  • Malicious activities: Cybersecurity threats like viruses, malware, and ransomware can cause files to be deleted, corrupted, or encrypted. Recovering deleted files can be crucial to restore the system to its previous state and prevent further damage.
  • Hardware failure: Storage media used in servers can fail due to various reasons such as physical damage, electrical failure, or wear and tear. This can result in file loss or corruption, and recovering deleted files can help restore data from the failed storage device.
  • System crashes or software errors: Server systems can experience crashes or errors that result in the loss or corruption of data. Recovering deleted files can help restore the system to a previous state and prevent data loss.
  • Compliance requirements: Certain industries or organizations may have compliance requirements that mandate data retention for a certain period of time. Recovering deleted files can ensure that data is retained and available when needed for audits or legal purposes.

How To Recover Deleted Files From a Server

Method 1: Recover Deleted Files From the Server Using Recycle Bin

Step 1: Open the Recycle Bin: Double-click on the Recycle Bin icon on the desktop or open it through Windows Explorer.

Step 2: Locate the deleted files: Browse through the Recycle Bin to find the files you want to recover. You can sort the files by name, size, or date to make it easier to find them.

Step 3: Restore the files: Right-click on the files you wish to recover and select “Restore.” This action will restore the files to their original locations on the server.

Method 2: Recover Deleted Folder From Server By Previous Version

To recover a deleted folder from a Windows Server using the “Previous Versions” feature, you can follow these steps:

Step 1: Open Windows Explorer: Open Windows Explorer on the server or on a client computer that has access to the server.

Step 2: Navigate to the parent folder: Locate the parent folder that contained the deleted folder. Right-click on the parent folder and select “Properties” from the context menu.

Step 3: Access the “Previous Versions” tab: In the Properties window, navigate to the “Previous Versions” tab.

Step 4: Select a previous version: The “Previous Versions” tab will display a list of available previous versions of the folder. These are snapshots created by the Volume Shadow Copy Service (VSS). Select the most recent version that includes the deleted folder.

Step 5: Restore the folder: Click on the “Restore” button to restore the selected previous version of the folder. You may be prompted to choose a location to restore the folder to, or it may be restored to its original location.

Step 6: Verify the restored folder: After the restoration process completes, navigate to the location where the folder was restored and verify that the deleted folder has been recovered.

Please note that the availability of previous versions depends on whether the Volume Shadow Copy Service (VSS) is enabled and configured on the server, and whether previous versions were created for the specific folder. The “Previous Versions” tab will only display available previous versions if they exist.

Method 3: Recover Deleted Folder From The Server By Backup

Step 1: Identify the backup source: Determine the location or storage medium where the backup of the server is stored. This can be a separate backup server, an external hard drive, a network-attached storage (NAS) device, or a cloud backup service.

Step 2: Access the backup: If the backup is stored on a separate server or storage device, establish a connection to it. If it is a cloud backup service, log in to the service using the appropriate credentials.

Step 3: Locate the backup: Navigate through the backup storage to locate the specific backup that contains the deleted folder you want to recover. This may involve selecting the correct backup set or backup date.

Step 4: Restore the folder: Once you have identified the backup that contains the deleted folder, initiate the restoration process. Depending on the backup solution, you may have different options for restoring files and folders. Select the deleted folder and choose the appropriate restore location, which can be the original location or a different destination.

Step 5: Verify the restored folder: After the restoration process completes, navigate to the location where the folder was restored and verify that the deleted folder and its contents have been successfully recovered.

Method 4: Restore Deleted Files From Server Using Hi5 File Recovery

Hi5 File Recovery is an award-winning tool loved by millions of users across the globe, the tool is user-friendly to make recovering deleted files from a Windows server extremely easy. You can restore easily your files without any modification. The tool is built with powerful algorithms that dive deeper into the petition to recover more than 280 types of files lost due to any reason It supports all kinds of brands of windows. The tool is compatible with all versions of Windows and Mac.

Download NowDownload Now

Steps To Restore Deleted Files From the Server

Step 1: Download and install Hi5 File Recovery Tool on your desktop

Step 2: Then you will get the two main windows, Deleted File Recovery option, and Lost File Recovery.

Step 3: Select the appropriate option based on the situation you are facing.

Step 4: The software will ask you to Select the drive from where you want to recover files. 

Step 5: Choose the drive and click on the Next option to initiate the file Recovery process.

Step 6: Wait for a while.

Step 7: Once the data recovery process is completed, you can view recovered files using the Preview option.

Step 8: Click on the Save option to save retrieved files on any desired location

Useful Tips To Prevent Deleted Files From  Windows Server

  • User access controls
  • Regular data backups
  • Versioning or revision control
  • File and folder permissions
  • File retention policies
  • User training and awareness

Conclusion:

Here we end our discussion on recovering deleted files from the Windows server. Where we have explained 6 ways to help you get back deleted files from the Windows server. However, if you are looking for an easy yet quick way to recover deleted files from a Windows server. We suggest you make use of the Hi5 File Recovery Tool. If you have any additional questions, feel free to drop them in the comment section below.

How To Recover Photos Lost During Transfer?

Worried that your photos are been lost while transferring and you have no idea how to recover lost photos while moving? Do not worry about this article about how to recover your lost photos while moving. By using Hi5 Photo Recovery Tool

Losing precious photos during a transfer can be a frustrating and disappointing experience. Whether you lost files while moving folders to your computer or from one device to another, there are a few steps you can take to try and recover them.

Firstly, it’s important to stop using the device you were transferring the photos to or from, as continued use can overwrite the deleted files and make them permanently unrecoverable.

Next, check if the photos were actually lost or if they were simply misplaced in another folder or location. Sometimes, files can be accidentally moved or renamed during a transfer, so it’s worth doing a thorough search of your device to see if they can be located.

Reasons Why a Photo Transfer May Fail?

There are several reasons why a photo transfer may fail, resulting in the loss of your precious photos. Some of the common reasons are:

  • Corrupted Files: If the photos you are transferring are corrupted, the transfer may fail or result in incomplete data. Corruption can occur due to various reasons such as a virus, power failure, or improper handling of storage devices.
  • Connectivity Issues: Sometimes, connectivity issues such as weak Wi-Fi signals or cable connections can cause a lost picture while transferring. This is especially true when transferring large files such as high-resolution photos or videos.
  • Insufficient Storage Space: If the device you are transferring the photos to does not have sufficient storage space, the transfer may fail, or only a portion of the photos may be transferred.
  • Incompatible File Formats: Incompatible file formats may also cause transfer failures. For example, if you are trying to transfer a RAW image file to a device that doesn’t support the format, the transfer may fail to recover files lost while moving.
  • Software or Hardware Malfunction: Malfunctioning software or hardware can also cause photo transfer failures. This could be due to a malfunctioning USB port, an outdated driver, or a corrupted transfer software.
  • Human Error: Finally, human error, such as accidentally disconnecting the device during transfer, or accidentally deleting the files, can also result in a transfer failure.

How Do I Recover Photos Lost During Transfer?

Method 1: Recover Photos Lost While Transferring By Recycle Bin

If you have lost pictures while moving them, one of the first places to check for them is the Recycle Bin (Windows) or Trash (Mac). When you delete a file or folder, it is typically moved to the Recycle Bin or Trash first, where it can be restored if needed. Here’s how you can try to retrieve your pictures using the Recycle Bin:

Step 1: Open the Recycle Bin by double-clicking on its icon on the desktop.

Step 2: Look for the folder or file that contained the lost pictures. You can sort the contents of the Recycle Bin by name, date deleted, size, or type by clicking on the appropriate column header.

Step 3: Once you have located the folder or file, right-click on it and select “Restore” to return it to its original location. Alternatively, you can click on the folder or file and then click on the “Restore this item” button in the Recycle Bin toolbar.

Step 4: If you have accidentally emptied the Recycle Bin, you can still retrieve your pictures by using data recovery software. There are many reliable data recovery programs available that can scan your hard drive and recover deleted files, including pictures.

Method 2: Recover Files Lost While Moving Using File Explorer

If you have lost photos while moving them, you may be able to recover them using File Explorer in Windows. Here’s how:

Step 1: Open File Explorer by clicking on the folder icon on your taskbar or pressing Windows + E.

Step 2: Navigate to the location where the photos were located before they were lost.

Step 3: Right-click on the folder that contained the photos and select “Properties.”

Step 4: Click on the “Previous Versions” tab.

Step 5: You will see a list of previous versions of the folder, sorted by date and time. Select the most recent version before the photos were lost and click “Restore.”

Step 6: If the folder is not available in previous versions, you can try using the “Search” feature in File Explorer to look for the photos. Open File Explorer and enter the name of the photos or the file type (e.g., .jpg, .png) in the search bar.

Method 3: Retrieve Pictures Lost While Transferring By Using Hi5 Photo Recovery Tool

Hi5 Photo Recovery is an award-winning tool loved by millions of users across the globe, the tool is user-friendly to make recovering pictures lost while transferring extremely easy. You can recover photos that were not backed up without any modification. The tool is built with powerful algorithms that dive deeper into the petition to recover more than 500 types of photos lost due to any reason. The tool is compatible with all versions of Windows and Mac.

Download NowDownload Now

Steps To Recover Photos That Were Not Backed Up

Step 1: Download Hi5 Software Photo Recovery Tool and complete simple installation steps

Step 2: Two major options will be displayed – the “Deleted Photo Recovery” option and the “Lost Photo Recovery” option. (If you think images are missing, then select the Lost Photo Recovery option. If the pictures are deleted knowingly or unknowingly, then go with Deleted Photo Recovery option)

Step 3: Select the drive from where you want to recover photos(If you’ve connected external storage drives, then select that particular disk) and click on the “Next” option to start the photo recovery process 

Step 4: The image recovery process will take some time…

Step 5: After finishing the photo recovery process, you can view recovered pictures in “Data Type View” and “File Type View

Step 6: Click on the “Save” option to store retrieved photos in any location of your choice successfully!

Tips For Preventing Lost Photos While Transferring

  • Always back up your photos before transferring them
  • Use reliable transfer methods
  • Check the transfer process
  • Avoid interrupting the transfer process
  • Use antivirus software
  • Keep your device in good condition
  • Use a reliable photo management software

Conclusion:

Here we end our discussion on recovering files lost while moving. Where we have explained 6 ways to help you get back deleted pictures. However, if you are looking for an easy yet quick way to how can I recover my lost photos after transfer? We suggest you make use of the Hi5 Photo Recovery Tool. If you have any additional questions regarding this article, Feel free to drop them in the comment section below.